ASIAIR Plus review
NOTA: This article has been published in Issue 94 of Amateur Astrophotography Magazine
I wanted to review the ASIAIR Pro for a long time. However, a few days ago I received the ASIAIR Plus that I ordered as part of the ASIAIR Plus Experience Officers program, so I got down to business.
Introduction to ASIAIR equipment
The ASIAIR products began to hit the market in 2018. The first version was clearly a Raspberry Pi in its original case and only allowed to control the equipment by connecting it to the USB ports.
In 2019 they launched the ASIAIR Pro and the impression I had of the device from the beginning was very good.
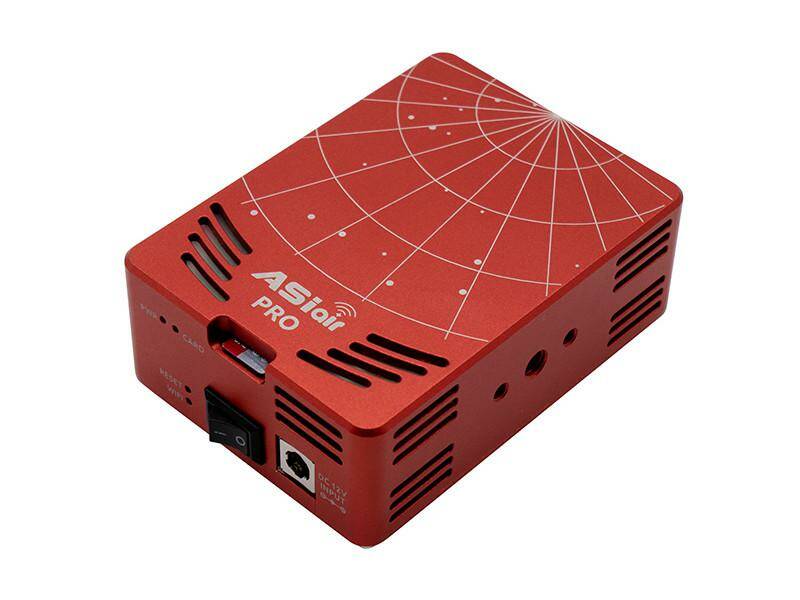
The ASIAIR Pro is a more powerful device based on the Raspberry Pi 4 with a series of connectors added by ZWO that allow controlling the power of the rest of the devices as well as an intervalometer port to control DSLR cameras.
Now in 2021, ZWO has launched the ASIAIR Plus. An improved version of the ASIAIR Pro.
But the important thing about these devices is not the device itself, but the combination of it with the ASIAIR app.
The ASIAIR is the computer that controls all your devices, but in the app is where the ASIAIR itself is controlled, and I have to say that the app is a real joy.
It includes almost all the operations and tools that you may have to use during an astrophotography session in different configurable modules and designed to be used with a very easy and intuitive touch interface to control almost any parameter of the module. I will talk about these modules more in depth in the future.
Obviously the device is compatible with almost (and I say almost because there are some exceptions such as the ASI120MC and ASI120MM cameras) all ZWO cameras, the focuser and the ZWO filter wheel and more than 40 mounts from multiple brands. It is also compatible with most Canon and Nikon DSLR cameras, which makes this device very versatile and with very good compatibility if your equipment is based on ZWO hardware.
It is also true that there are other brands that are not compatible such as QHY, Sony cameras, focusers and wheels from other brands. Perhaps in the future ZWO will open the possibility of using these devices, but for now its strategy is to support only its hardware and the most used brands of DSLR cameras.
However, and although the device is a marvel for doing astrophotography, there were some things that could be improved in the ASIAIR Pro version:
- The range of the wireless connection was very small, as the Raspberry Pi's antenna is inside the aluminum casing of the ASIAIR Pro, attenuating the WiFi signal. If you are a handyman and you dare to open the ASIAIR, there is a tutorial on youtube on how to add an external antenna. I have done it myself, although the tutorial is incomplete because more things are needed apart from soldering the connector, as can be seen in this video.
- The operating system is stored on a MicroSD memory card, which are sometimes unreliable. This means that you have to take backup copies of the system to avoid losing both the ASIAIR Pro system and its configuration and even the photos that you have stored.
- The only ways to download the captured images to a computer are by network connection to the ASIAIR or by connecting the SD card directly to the PC, with the risk that when connected to the computer the file system may be damaged or modified and then not work in the ASIAIR.
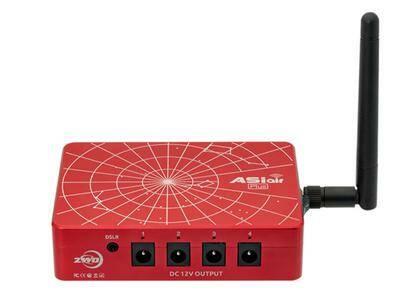
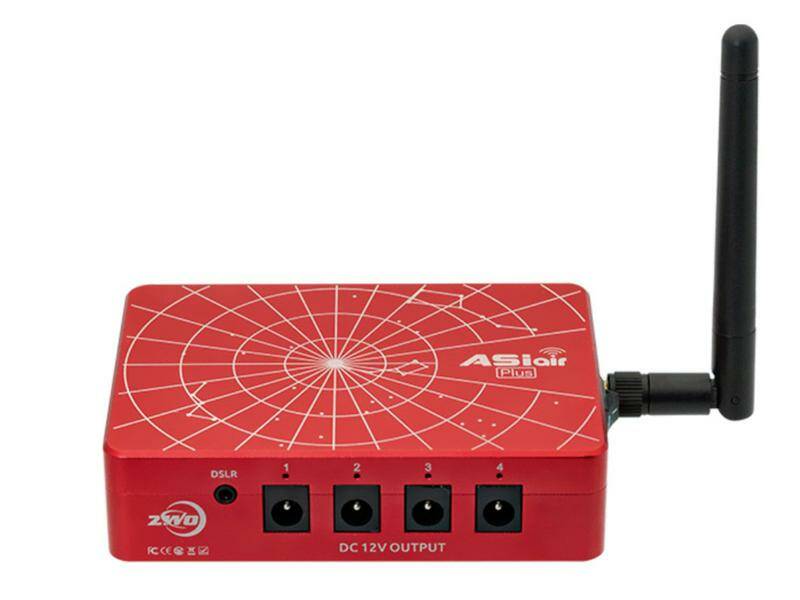
The ASIAIR Plus
It seems that the folks at ZWO have listened to and listened to the ASIAIR Pro user community, and this year they released an improved version. This new version called ASIAIR Plus, brings with it a series of improvements that are very welcome:
- The sometimes unreliable MicroSD card is no longer necessary. They have included an internal 32Gb eMMC memory that saves the system and also allows the storage of the captured images. The capacity for images is approximately 20Gb. The reading and writing speed of this memory is better than the vast majority of MicroSD cards, which gives the system a little more fluidity when it comes to saving and reading images.
- Although the need for the MicroSD card for the system has been eliminated, it has a MicroSD card slot to expand the device's storage if necessary.
- The ASIAIR Plus has a USB-C port that allows files to be copied directly to the PC without having to connect to it via WiFi
- External antenna for 2.4 / 5Ghz dual-band WiFi with a mid-range of 20M in 2.4Ghz mode. This solves the connection problems we had with the ASIAIR Pro.
- Indicator LEDs have been added to each power connector of the devices to be able to control which ones are active at all times.
- What used to be a small hole to reset the ASIAIR Pro is now a button.
- Real-time monitoring of the voltage, current, power consumed by the ASIAIR Plus and the connected devices, as well as the status of the device itself.
- The device is a little thinner, which is appreciated when it comes to storing the equipment for transport, especially if you have the entire system pre-assembled like me.
The best thing about all this is that despite the added improvements it has hardly changed in price. In fact, right now they have lowered the price of the ASIAIR Pro to $ 249 (previously it was $ 279) and the ASIAIR Plus costs $ 299.
Box contents
The ASIAIR Plus comes with 4 power cables of different sizes and a power extension cable. It also has a USB3 cable for the camera.
In the Pro version, it also came with a 64Gb USB 3 pendrive, a MicroSD card with the system that is not necessary in the Plus.
I have made this video in which I show the content and also explain the main differences between the ASIAIR Plus and the Pro. It has english subtitles.
Impressions and conclusions
The ASIAIR Plus is still the same product as the ASIAIR Pro with some improvements. However, the equipment is a little faster in reading and writing the images, which speeds up the work with the equipment a lot, and the improvement in connectivity is much appreciated.
In the application section, the changes between the Pro and the Plus are minimal. If you already knew how to use the ASIAIR Pro, you don't have to learn new programs to use the ASIAIR Plus.
The only difference is really in the power panel in which we can see the real-time consumption of the ASIAIR Plus and the devices connected to it, apart from having the option of internal memory or the SD card.
My recommendation is that if your cameras, focuser and / or filter wheel are from the ZWO brand, the ASIAIR is an ideal complement, especially for the time you save setting up a laptop and the applications you need. With the ASIAIR you forget all that.
Plus, it dramatically streamlines your workflow. Bring everything you need to do an strophotography session without major complications. Obviously, everything is very simplified at the cost of losing flexibility in the most advanced configuration, but honestly, I have not needed to go into so much detail so far.
In the following video I explain how to use the ASIAIR Plus in an astrophotography session following a very simple workflow. It has english subtitles.
Possible improvements
There are some things that from my point of view should be improved in the product.
- Image contrast adjustment on the guidance screen: It would be ideal to be able to adjust the contrast of the stars in the image captured by the guiding camera as can be done in PHD2. That would help a lot in focusing the guide scope as well as in selecting the guide stars.
- Control of two cameras: In the case of dual configurations it would be very nice to be able to control a second camera for captures and synchronize the exposure times to avoid dithering spoiling the shots of the secondary telescope.
- Video FPS Increase: The video capture speed is quite poor. I understand that the ASIAIR may not have as much computational power to capture at that speed, but it is an important improvement point for those who do planetary.