PHD2 Guiding - Autoguiding in astrophotography - Part 2
NOTE: This article has been published in issue 74 of Amateur Astrophotography Magazine
In the previous article about astrophotography guiding, I explained the theoretical concepts behind this technique.
In this article I will show a practical example using my equipment to explain how to configure the camera and start the guidance in an astrophotography session.
Initial requirements
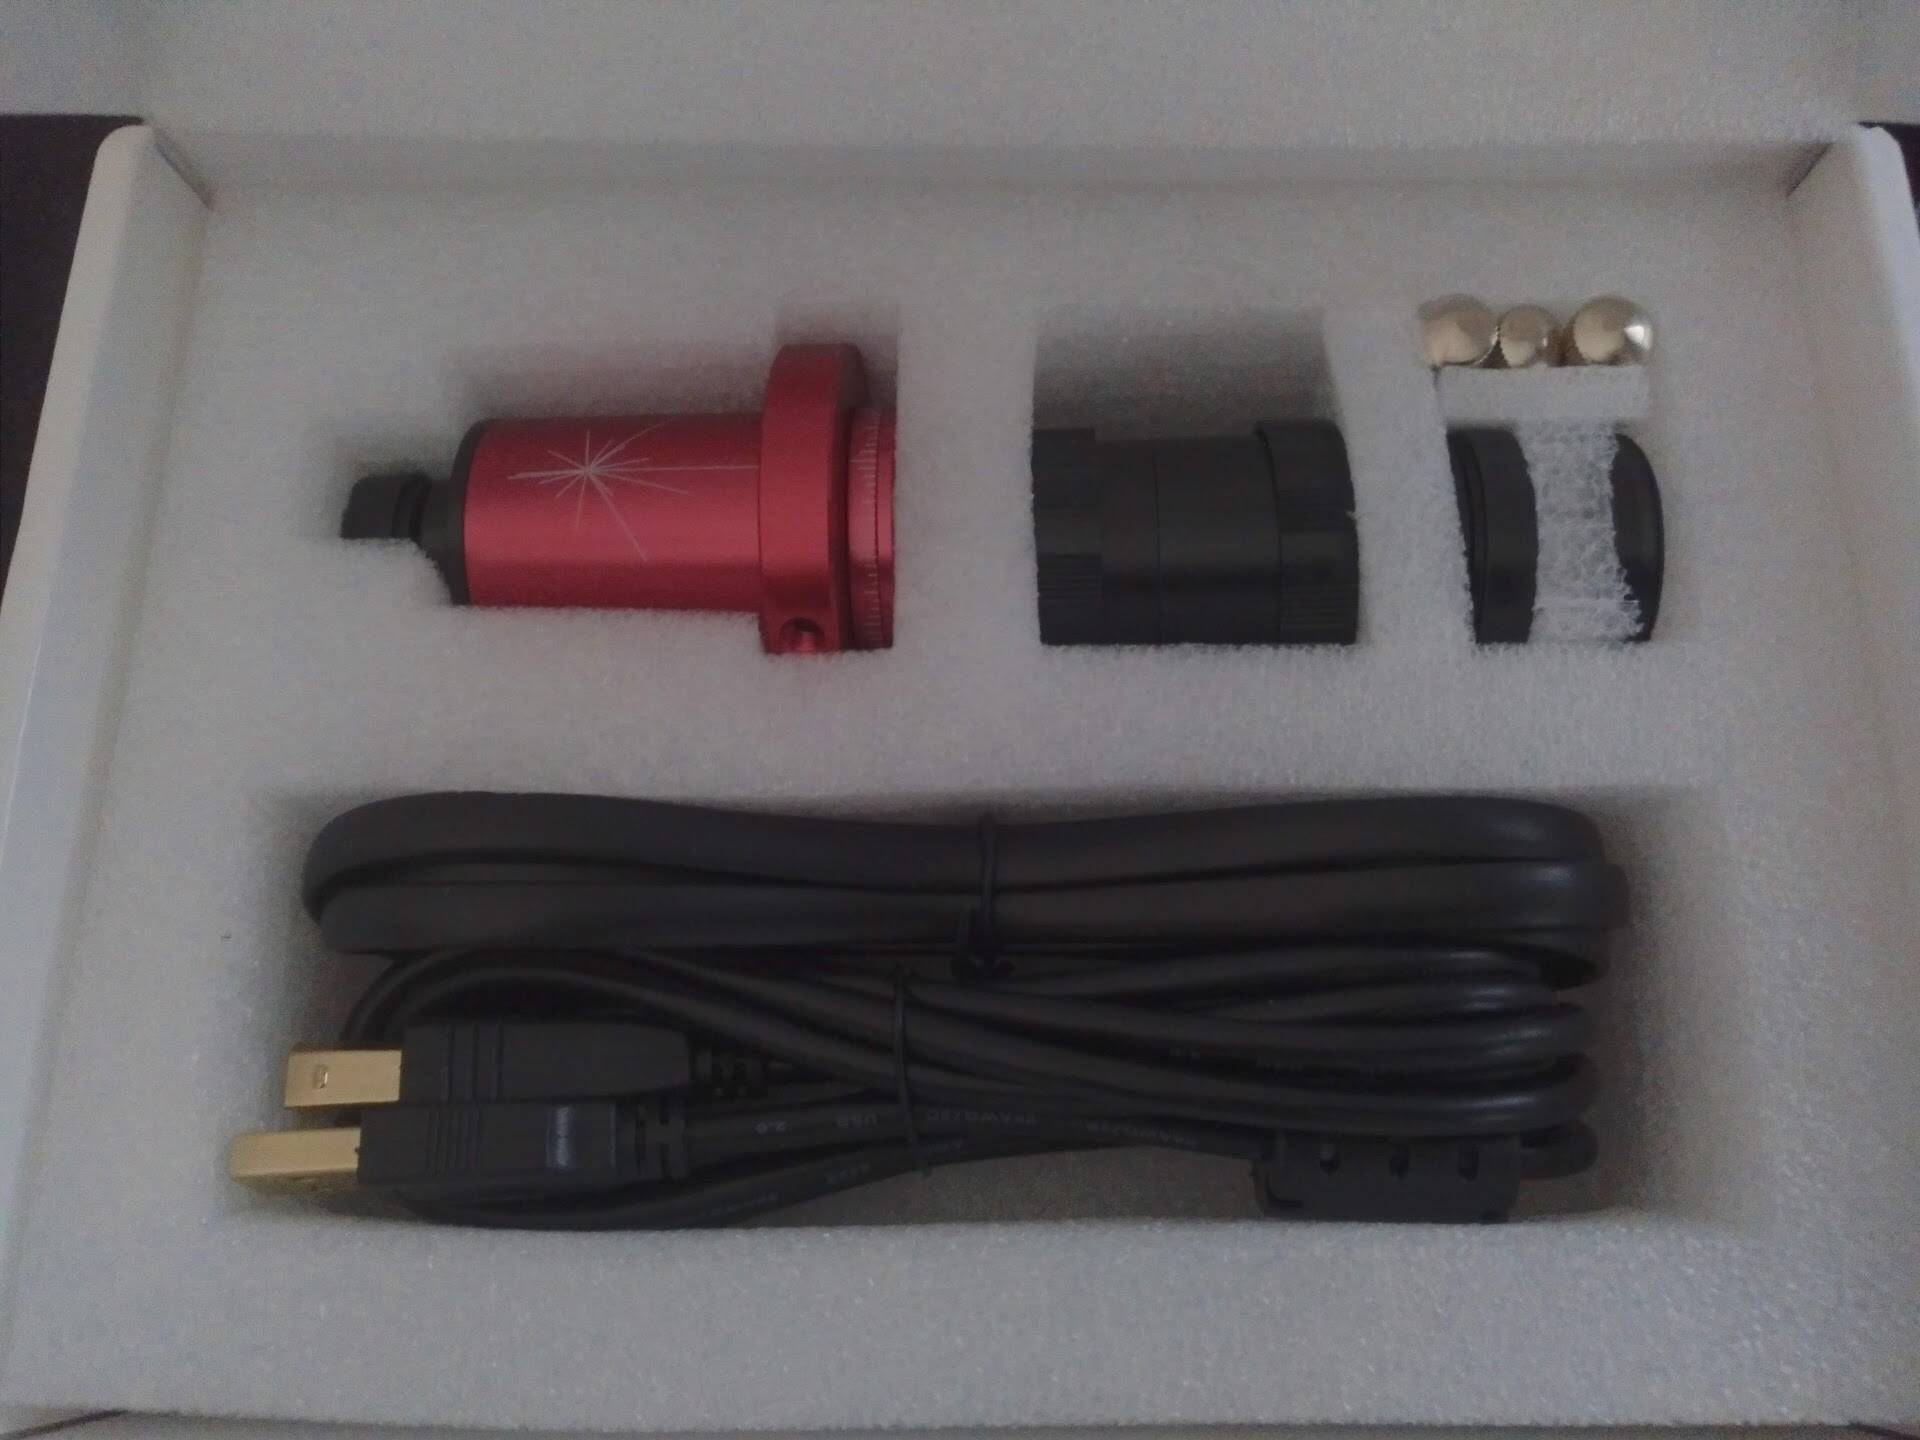
Before starting to use the guidance we must prepare both the necessary equipment and the software that will allow us to guide. Below I detail my equipment although the process is easily adaptable to other types of cameras, telescopes or off-axis guides.
Camera
The camera I use to guide is a T7 Astro. A Chinese camera that is an exact clone of the ZWO ASI120MC camera.
This camera is very sensitive and it is possible to obtain images of dim stars with sufficient brightness to guide with 1 second exposures. This allows the guiding error to be very small and that there is always a star in the image on which to guide.
If you prefer a better camera, with the same specs, ASI120MC-S is a very good option and also is USB3, and that makes it ideal for planetary imaging and also it is compatible with the ASIAir.
Guiding telescope
I use the camera in conjunction with a small 130mm guiding telescope that I obtained on the internet. There is a lot of material for astrophotography in Aliexpress of very good quality, as is the case with this other small telescope.
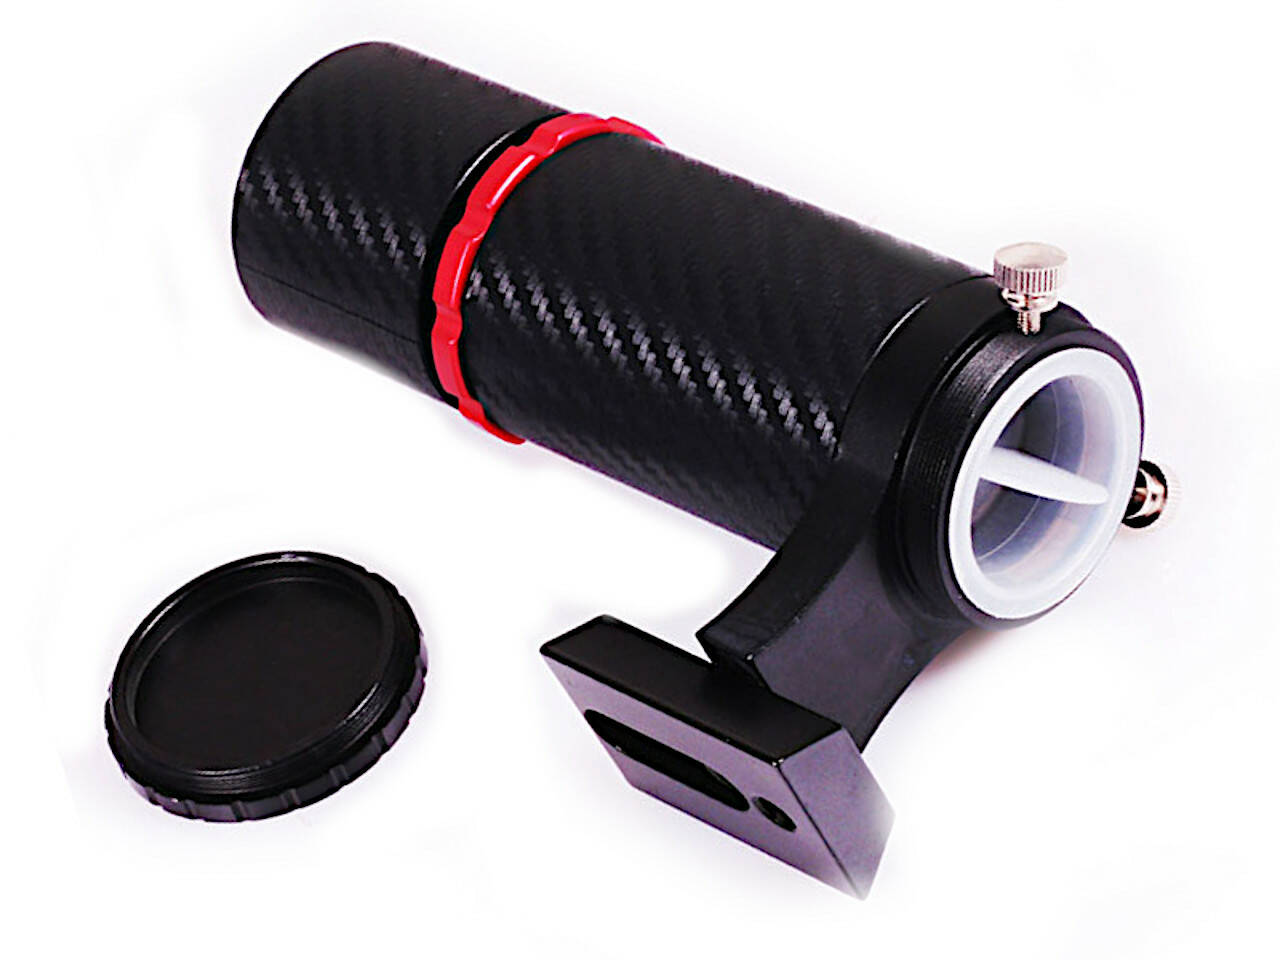
If you don't like using guiding scopes yoy always can use an off axis guider.
Software
To operate this camera we need to download the ZWO drivers and install them on Windows. In the case of using another ZWO camera the driver is the same for all its cameras. If it is from another brand we must install the driver specified by the manufacturer.
It is also recommended to install the ASCOM driver of our camera. ASCOM is a standard applicable to astronomical equipment. If a device supports ASCOM, it can be used in a way that is compatible with any software that uses ASCOM as a control system.
We will also need to install the PHD2 Guiding software in order to perform the guidance.
In the case of using Linux, we must install the drivers of our camera in addition to INDI. INDI is the equivalent of using ASCOM on Linux, also allowing remote connections to other INDI services via network and other interesting features Although in Linux there are several software alternatives such as KStar/Ekos, in the article we will focus on explaining how to use PHD2 which is one of the most widespread.
Assembly
Once we have all the equipment ready and the necessary software installed on the computer, we will proceed to the assembly of the equipment.
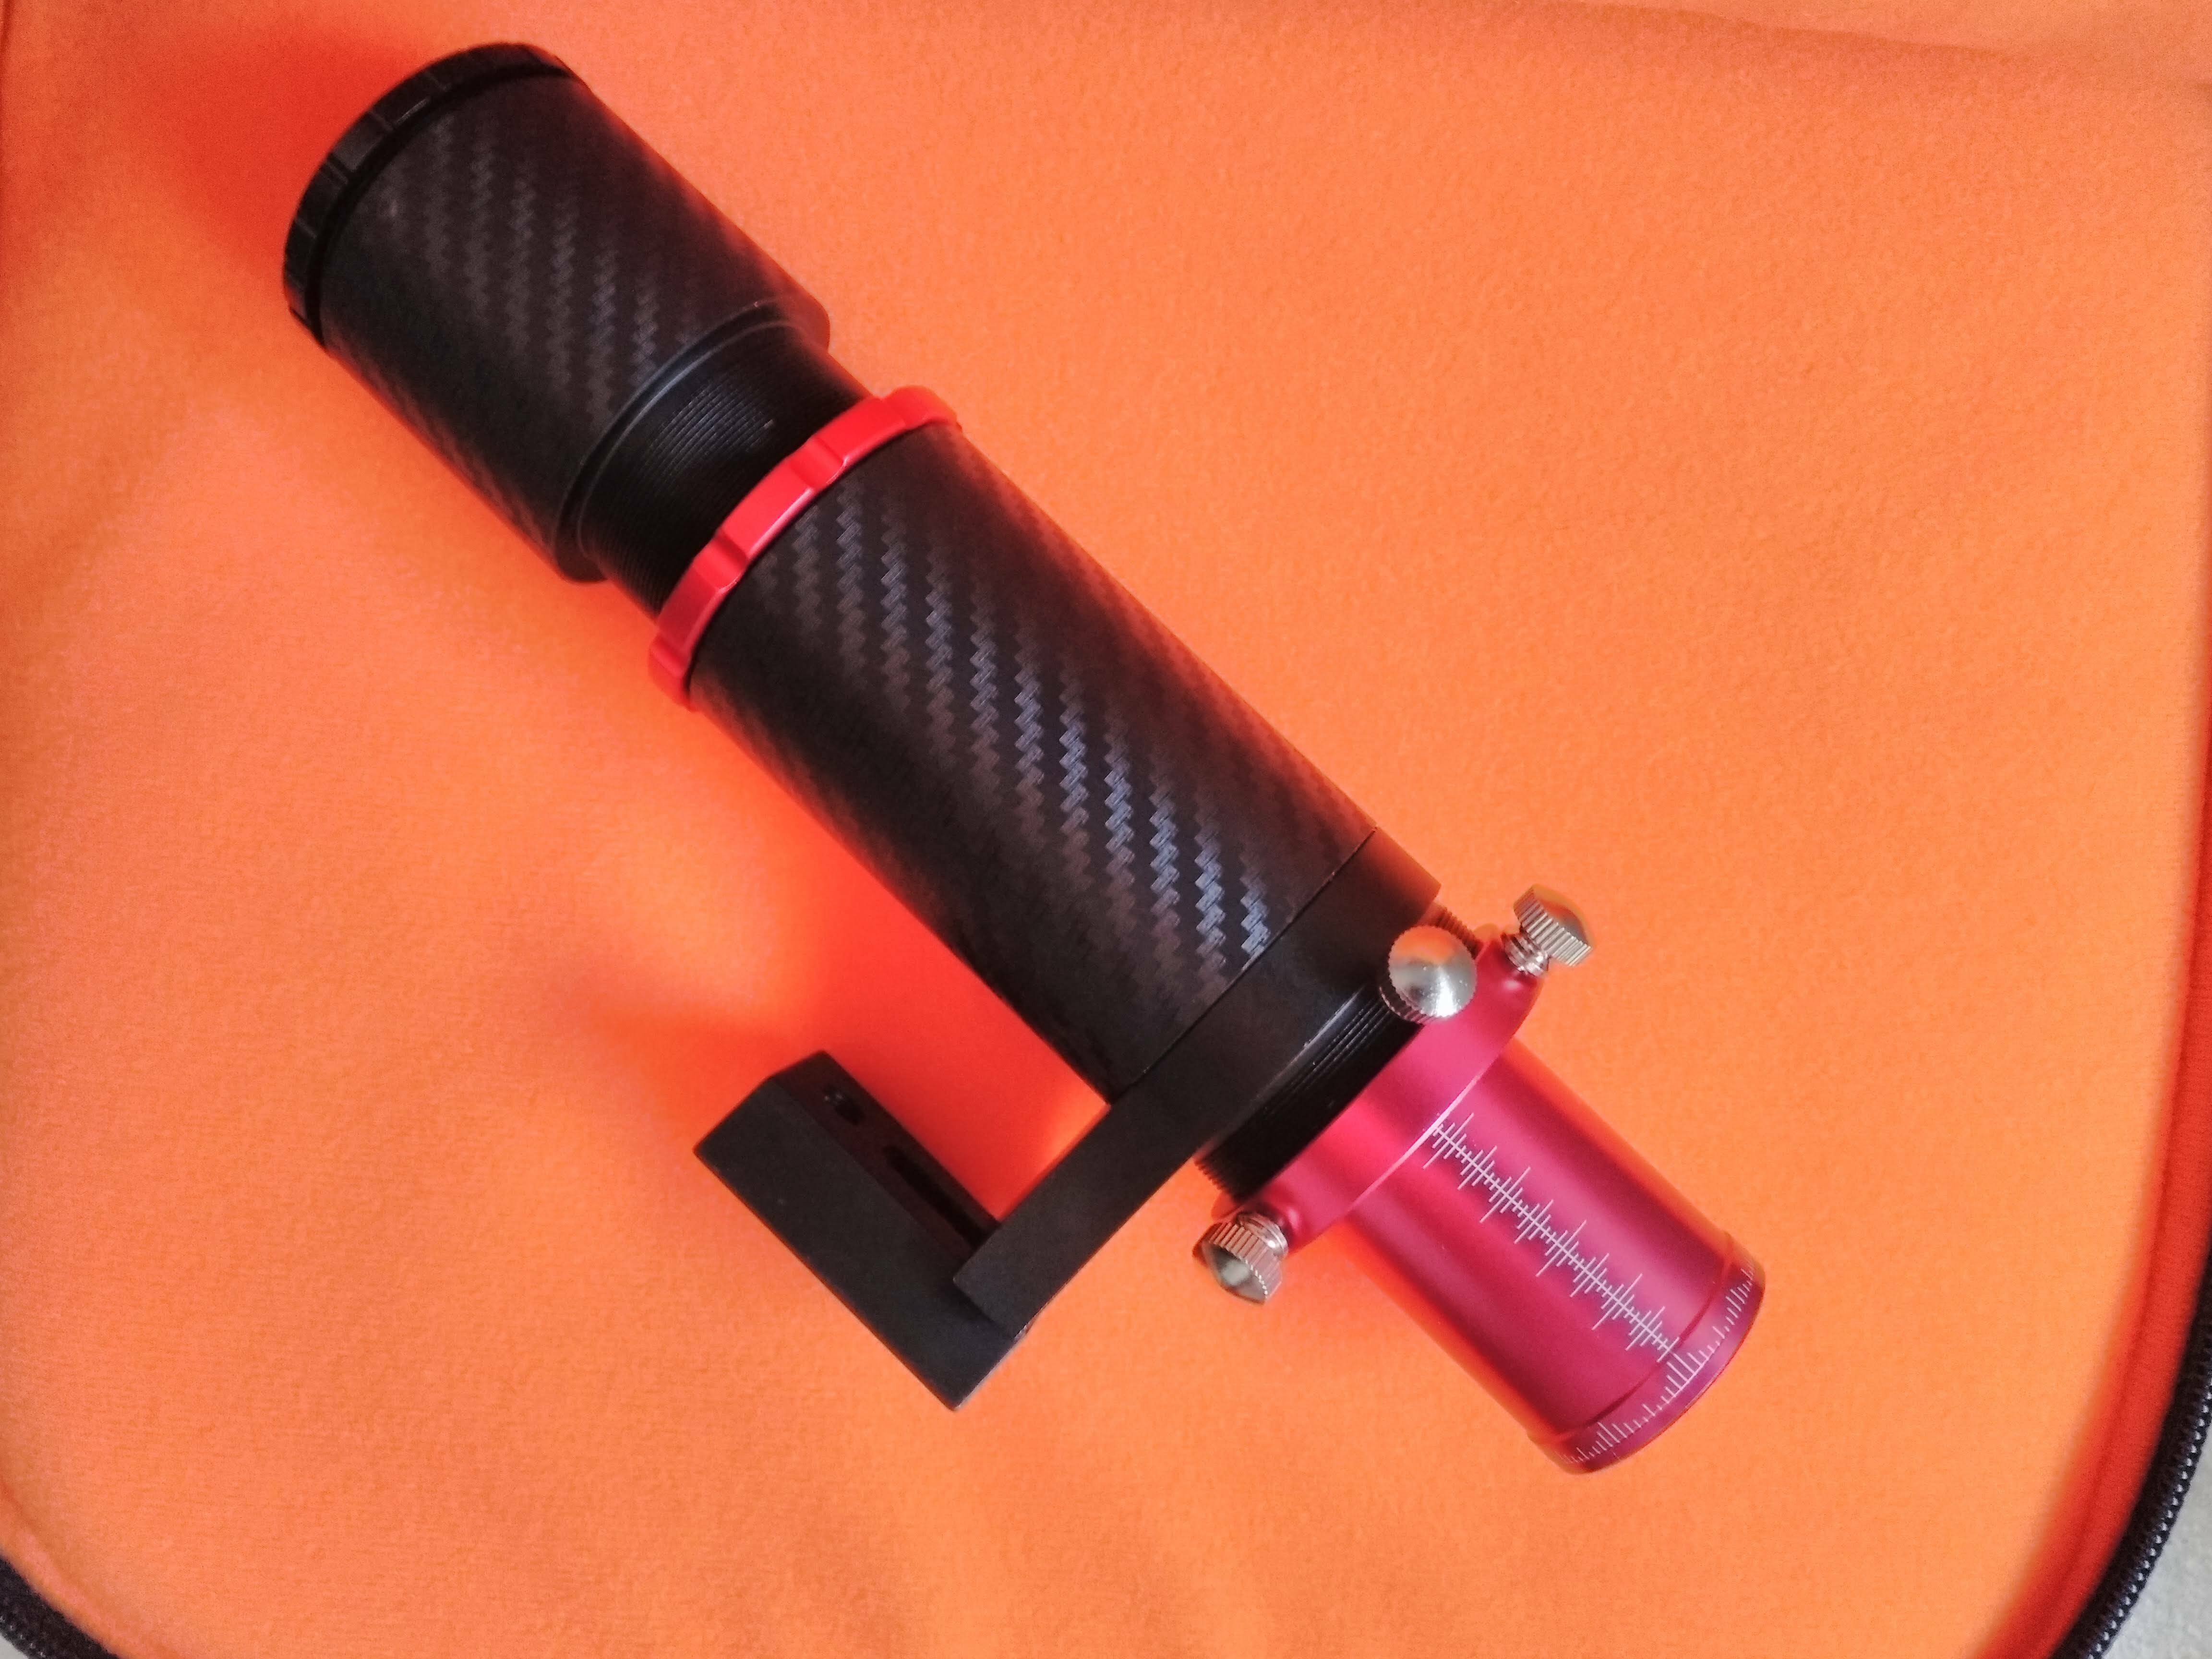
Guiding train
The first thing is to mount the camera in the mini telescope. To do this we will first put the camera and adjust the focus of the telescope or the position of the camera until we are able to focus to infinity.
To ensure that the results are as optimal as possible, it is best to make this approach using a very bright star before using it for the first time.
For this we need to connect the camera to the computer and use software that allows us to capture images with the camera. ZWO distributes a software called ASICAP that allows you to test your cameras very easily. I recommend its use for the initial focus and to prove that the camera works when we have problems.
Mounting the guide train on the optical train
Once the guided and focused train is mounted, it must be mounted on the optical train, since we need it to be mounted on the same mount as our main telescope.
Another thing to keep in mind is that it is recommended that the guide train points in the same direction as the optical train, since due to imperfections in the optical trains and in the movement of the frames (by counterbalance, imperfections of the gears, etc.) there may be differences in the apparent displacement of the image of the guiding camera and the main one, and this would generate images with worse quality, small trails, non-round stars, etc.
I use the telescope finder bracket to position the guidance telescope. Thus, both telescopes point in the same direction. It is not necessary that both telescopes are collimated, although it would be advisable that the field obtained in each of the two be similar to reduce differences in image distance and to use the guidance telescope as an electronic search engine.
PHD2 configuration
Once the equipment is assembled we have to configure the guiding software. The screenshots shown are from the PHD2 Linux version, but are practically the same as the Windows one.
Device Configuration
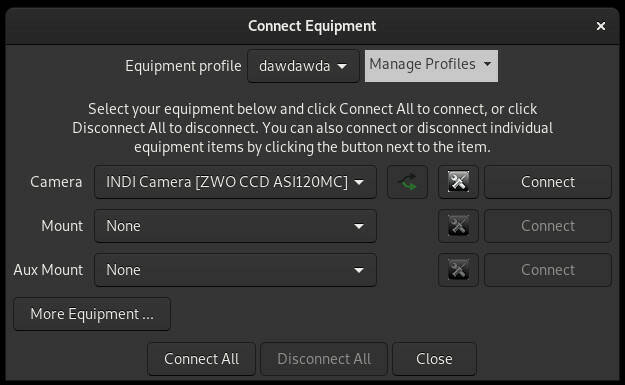
The first time we run PHD2 we will open a wizard in which we will be asked for the configuration of our equipment and the relevant data for guidance to save them in a profile. If for some reason, this assistant did not start or we have canceled it on previous sessions, the way to show it again is by going to the menu Guide , selecting the option Connect Equipment , and in the dialog shown we click the Manage Profiles dropdown and select: New using Wizard .
Once the wizard is open, the first step will be to select our camera and specify the pixel size of its sensor as well as the focal length of the guiding train. Normally, when selecting the camera, a dialog will as us if the camera is connected. If it is, PHD2 may attempt to read the pixel size information from the camera.
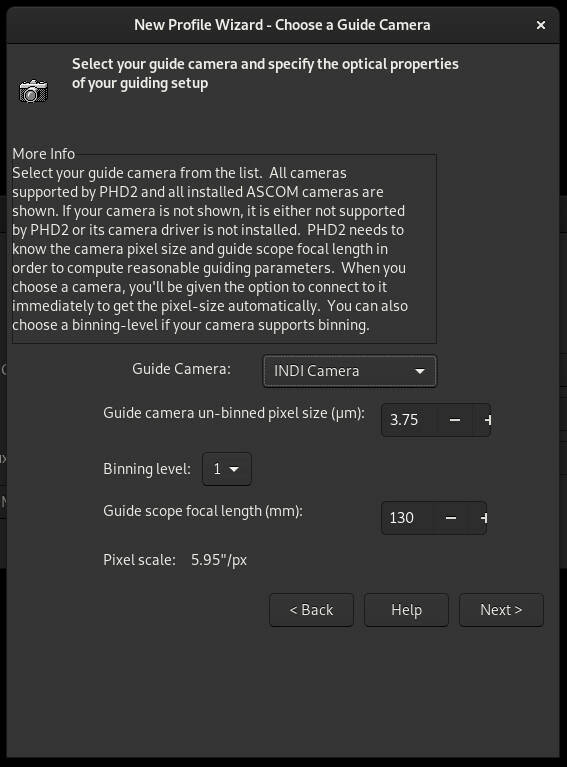
Anyway, we must manually enter the focal length of the telescope used. In this case, it is a 130mm mini telescope.
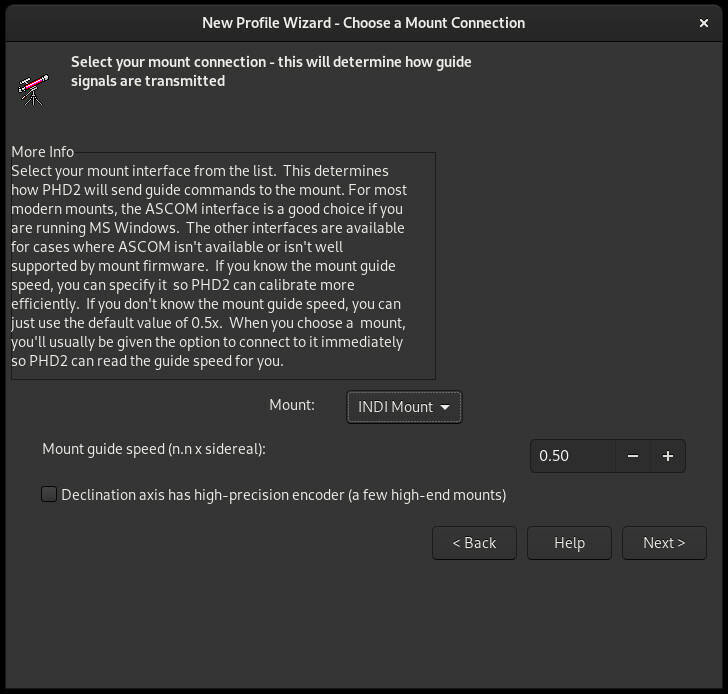
Once the camera is configured, click on the Next button to go to the mount configuration. We will simply select our mount from among those available. The rest of the parameters do not need to be touched in most cases, but if you want to know more about them, when you hover the mouse over them, a help text with more information appears.
In the next step, depending on whether our mount supports pointing information, we will be asked if we want to configure an auxiliary mount. This step is at the discretion of each user.
Finally we will be asked if we have an adaptive optics device. Like the previous step, if we have such device we will configure it and if not, we will go to the next step.
In the last step of the wizard we will be asked to add a name for the profile we just created. We can have several profiles with different cameras, mounts, guiding scopes and off-axis guiders, so it is good practice to name the profile so that we can easily identify it.
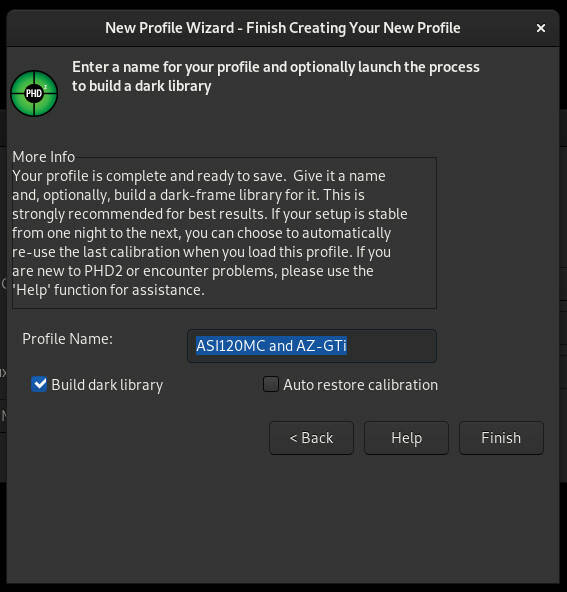
There are two boxes on this screen. The Auto restore calibration box allows the parameters of the last calibration we made to be automatically retrieved when we use that profile. I do not recommend using it, since the guiding is more accurate if we recalibrate after each point with the telescope. If the equipment we are going to use is a fixed equipment placed in an observatory, we may be interested in this option, but in my case I have to assemble and disassemble the equipment in each session.
The Build dark library box is checked by default. We need to create a library of darks of our camera so that PHD can remove much of the thermal noise from the camera in real time. Ideally, leave it marked and have the camera connected so that the process starts at the end of the wizard by pressing the Finish button.
Darks Library
The Build Darks Library dialog is quite simple. It allows us to select the minimum and maximum exposure time that we will use in PHD2 and the total number of shots we want to take for each exposure range. My recommendation is that at least 20 shots be made, and not 5 as it is configured by default, since the greater the number of shots, the more accurate our library will be.
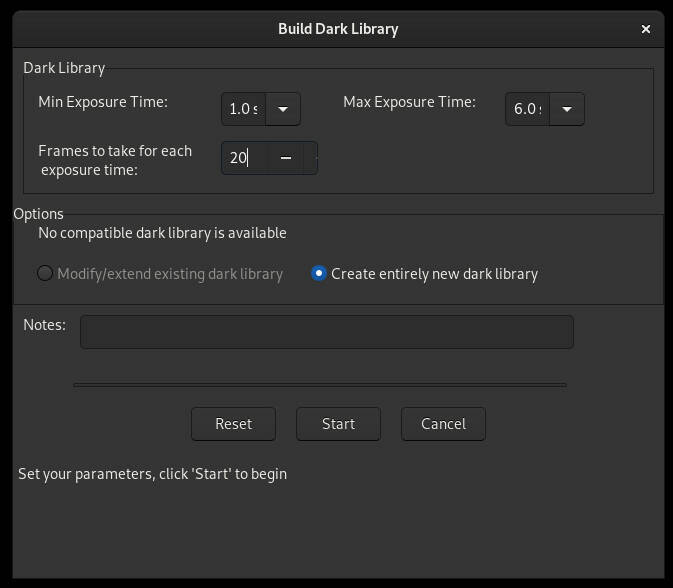
Once the process is started by clicking on the Start button, PHD2 will ask us to cover the camera before starting to capture. Press Ok when we have it covered and the capture process will begin. Depending on the number of exposures in fractions of 0.5s and of shots that we have selected, the process may take a while.
Bad pixels
Some cameras may have bad pixels. For guiding this is a problem, because PHD2 can take a bad pixel as a star and "think" that the mount has not moved since the last capture. If this happens, we would notice it because the corrections graph would come out completely flat, but we will talk about the corrections graph later.
PHD2 has a way to mark the wrong pixels of our camera. To do this we will go to the Darks menu and select the option Bad Pixel Map . A dialog will open in which we can specify an exposure time and a number of exposures to be carried out so that PHD2 detects and marks the wrong pixels of our camera.
![]()
The default values usually work well. Simply click on Start to start the process. PHD2 will ask us again to cover the camera, and when you click Ok the process will start.
When the process is finished, a window will appear with a summary of the data obtained to refine the erroneous pixel map. We leave the options as is and close the window. For more information about the calibration of the dark shots and wrong pixels of the camera I recommend reading the [PHD2 documentation] (https://openphdguiding.org/man-dev/Darks_BadPixel_Maps.htm)
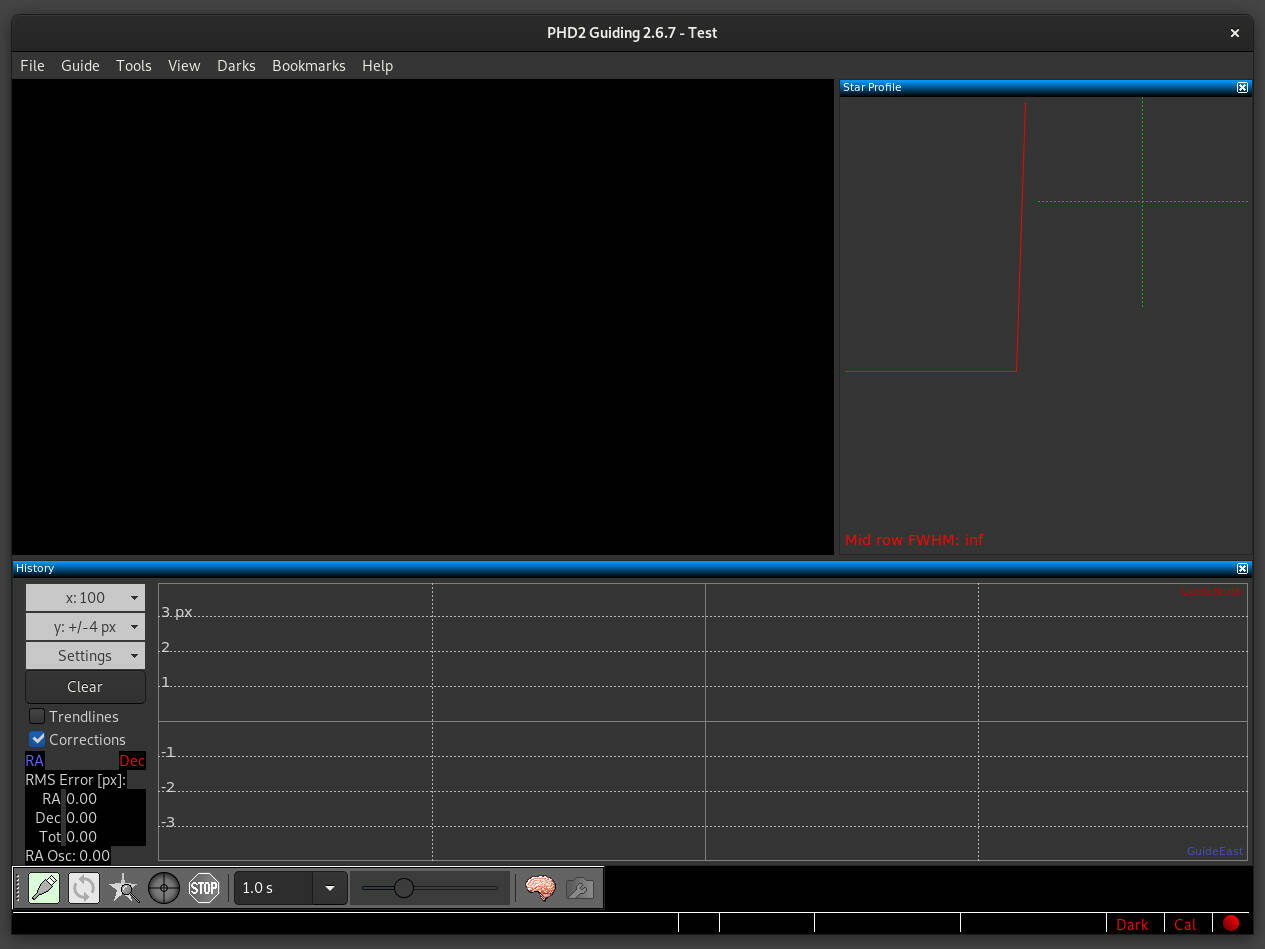
Interface views
Once we finished the calibration, we will need to configure the view of PHD2 so that we can have the information that interests us at a glance.
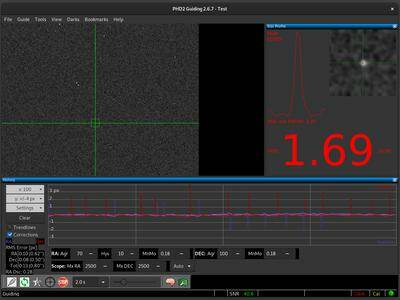
PHD2 has multiple tools to control and analyze guiding. In the menu View are all the elements that we can show and hide. For the purposes of this article, it is sufficient to show the elements Graph and Star Profile .
The next step is to configure the graph to more easily understand if the guidance we are doing is acceptable. To do this, just click the Settings dropdown in the graph and select Pixels as the unit to display.
PHD2 should be configured the same as the screen shown below:
Guiding process
We have the equipment ready to use and the software configured. It we only need to start the guiding and start taking photos.
Once the polar alignment is done and having the telescope pointed to the object to be captured, we must calibrate the guiding. It is advisable to do this process of guiding calibration every time we point to a new object and start capturing. Thus, the guidance will be as accurate as possible.
Calibration consists of selecting a star in the camera viewport and let PHD2 move the mount in the Right Ascension and Declination axes, so that it is able to know how much the mount moves for each pulse sent as well as the effect on the image.
With this information, PHD will be able to send the correct number of pulses to the mount at any time to correct the position of our mount during the capture session.
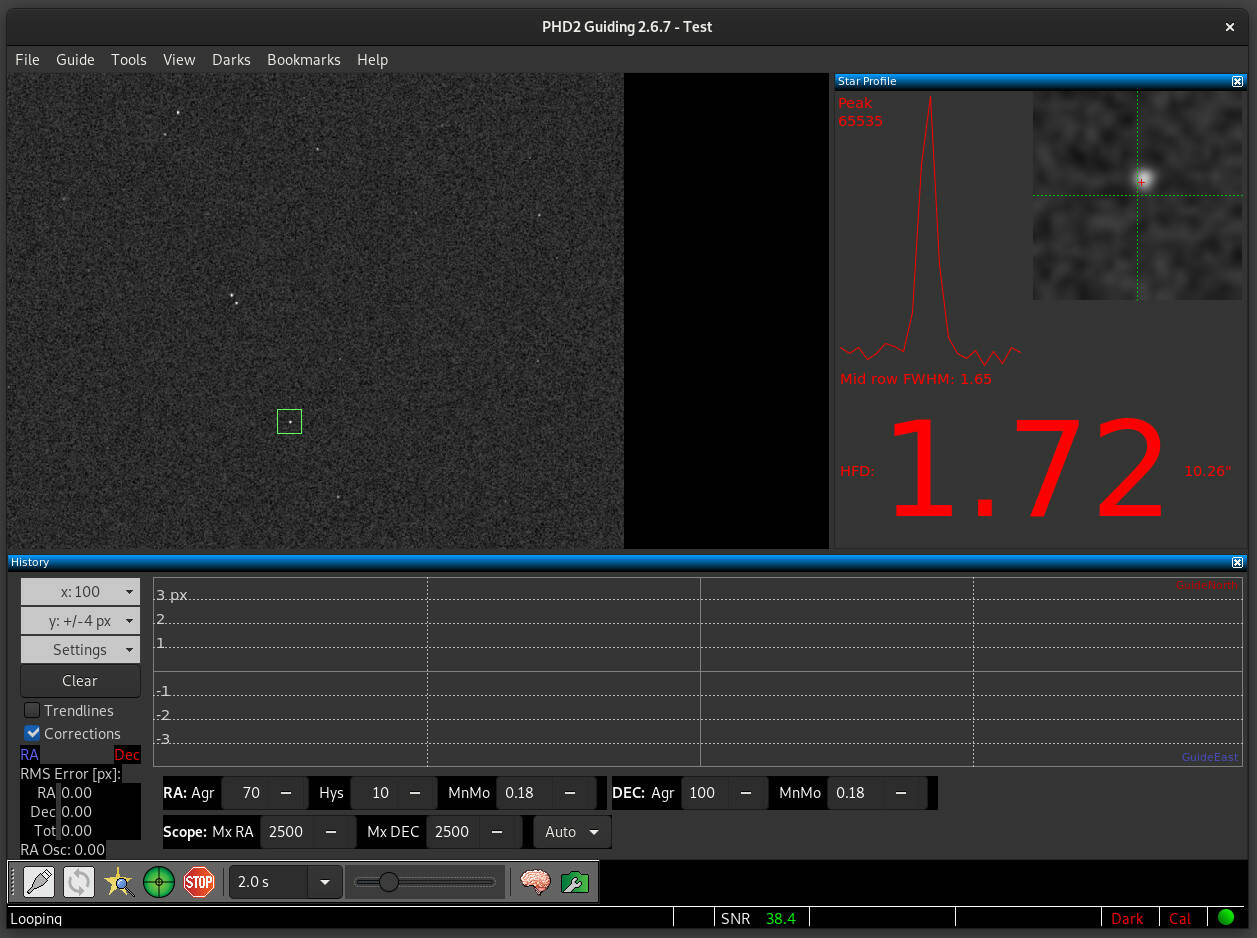
In the bottom toolbar of PHD2 there are several buttons that we will use during the guiding session. In the image we can see the buttons and if we move mouse over them we will see a description of their function.

For the example I will name the buttons by the name of this listing. From left to right, the buttons correspond to:
- Connect equipment
- Start capture
- Automatic star selection
- Start guiding
- Stop guiding
- Exposure time
- Brightness of the capture screen
- Advanced Options
- Camera options
The first step to start guiding is to connect the devices. Press the Connect device button and select the profile you want to use. We can connect and disconnect the equipment elements individually or all at once using the Connect All and Disconnect All buttons.
Once the equipment is connected we can start taking captures. Click on the Start capture button and we will see in the upper left part of the window what our camera is capturing. If we see that the captures are too dark or too bright we can adjust the exposure time and the brightness of the capture with the corresponding controls.
Then we must select a star. We can do it automatically by pressing the Automatic star selection button or we can click on the desired star with the mouse. As we do so, on the right side of the interface we will see the profile of the star in an enlarged image and its statistical parameters.
Now we are going to perform the guiding calibration. If it is not the first time that we have tried to guide with this equipment we go to the menu Tools > Modify calibration data > Clear calibration data . With this we will remove any previous calibration data. Once the data has been deleted, click on the Start guiding button.
PHD2 will begin calibration tests by moving the mount in its two axes. If everything goes well, it will automatically start guiding and we can start the process of capturing the photos with the main camera.
If we want to change the star or select it again, we simply use the Stop Guiding button and select the new star, as long as we do not move the telescope to another area of the sky it would not be necessary to redo the calibration. Pressing the Start guided button will suffice.
Check the guiding
To verify that the guiding is being done correctly we can check both the star profile and the corrections graph.

In the profile we must check that the star is as aligned as possible with the crosshair in the image. In the graph we can see two lines and some bars. The lines correspond to the two axes of the mount. Blue for the Right Ascension axis and red for the Declination axis. As we have configured the graph to show the units in pixels, what the lines show is the amount of pixels that our image deviates. Ideally, do not go beyond the range of +1 and -1 pixel, but if it comes out a little on time, taking into account the high resolution of today's cameras should not affect the capture too much.
The bars shown in the graph are the corrections that have been made and their size indicates in some way the amount of corrections that had been necessary at that time.
Conclusions
I hope with this article you will be able to start the guiding system quickly and easily. Obviously, this topic is prone to more discussion and PHD2 has many configuration options, tools and ways to adjust the guiding to be explained in only this article.
However, with this simple and low-cost configuration that I use, I had been able to guide and get takes of up to 10 minutes without much trouble. I could probably get longer shots, but I have not risked doing it (if you lose a 20-minute shot due to a guiding failure in the 15th minute it is not the same as losing a single 10-minute shot for that same failure in minute 5).
If you have any questions or have information that you want to share, contact me through my twitter account.