Polar finder for AZ-GTi
NOTE: This article was published on issue 80 of Amateur Astrophotography Magazine
Some people have asked me about the polar alignment of the AZ-GTi in equatorial mode and have asked for more details on how to add a polar finder to this mount and the process to align it.
In this article I am going to explain how to build the support for the polar finder that I use so that it can be used in conjunction with the AZ-GTi.
Supplies
We will need a few things before we start. The following list is a suggestion of the materials that I have used that have been best for me due to availability, but can be easily adapted to other components. The important thing is the idea: a tube with adjustment screws and a polar finder inside that can be attached to the AZ-GTi easily and comfortably.
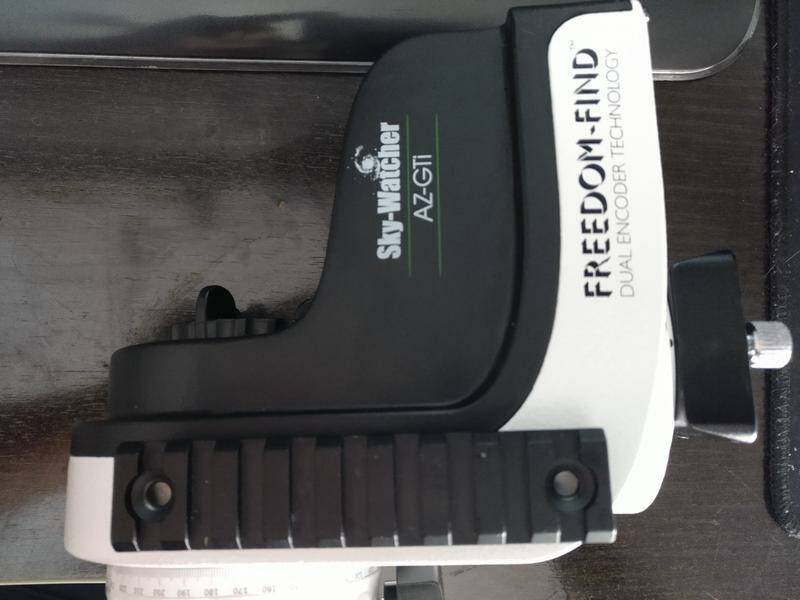
Obviously, it is essential to have an AZ-GTi
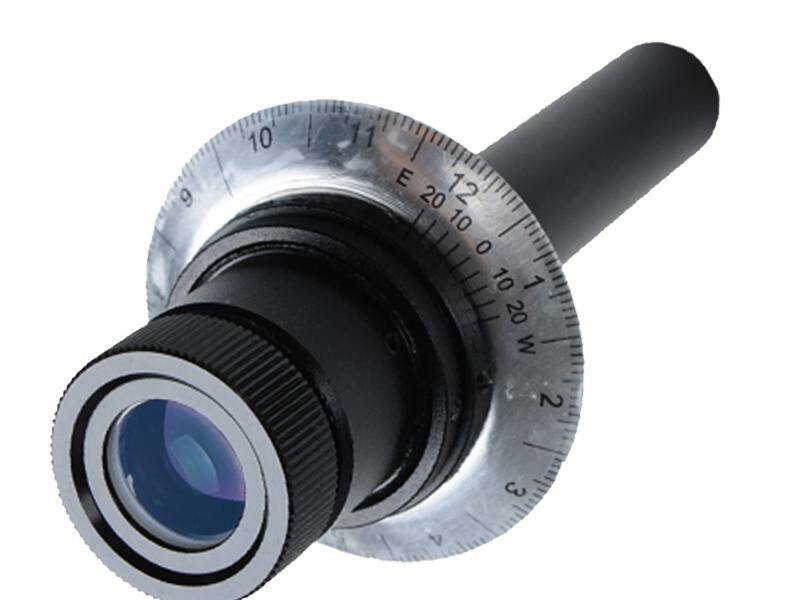
- A polar finder. The one I've used is a Skywatcher EQ6 polar finder
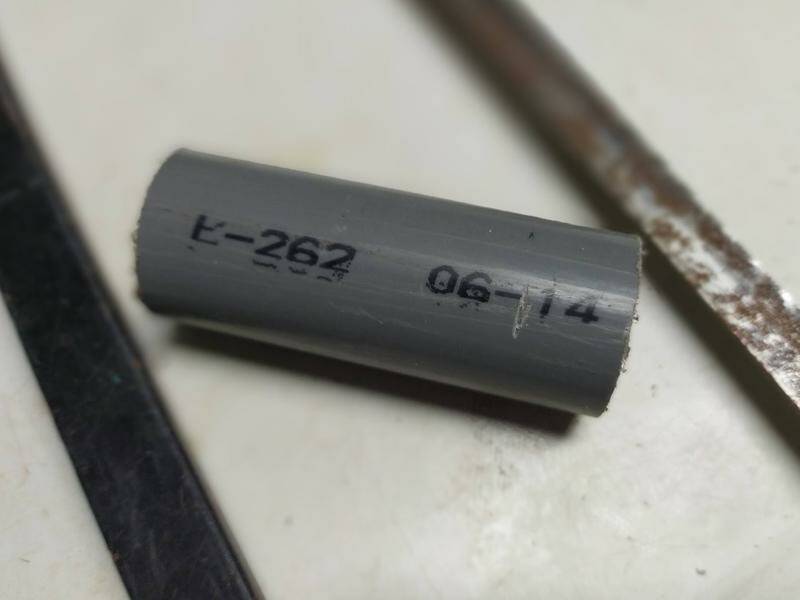
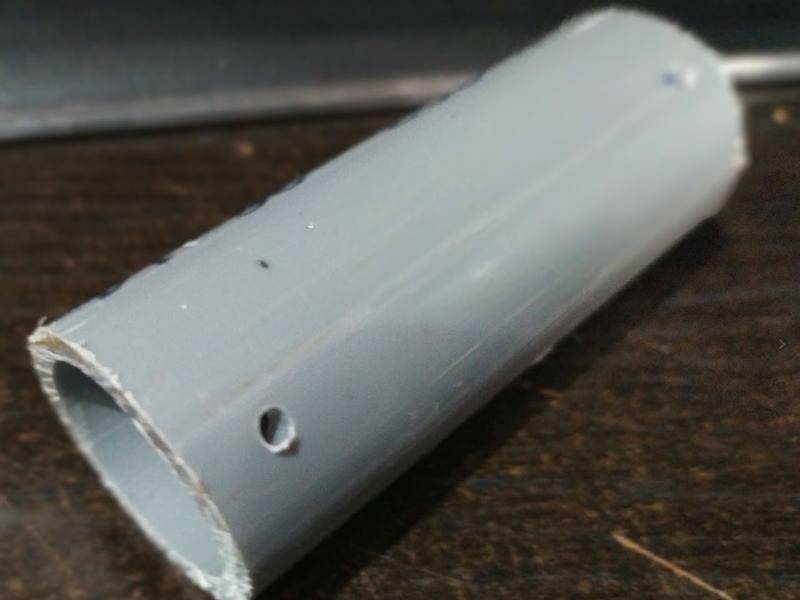
- PVC pipe with an internal diameter that allows the search engine to be inserted inside and that has at least 5mm of space around it. I have used one of inner 25mm and outer 32mm. It can be found at any hardware store.
None
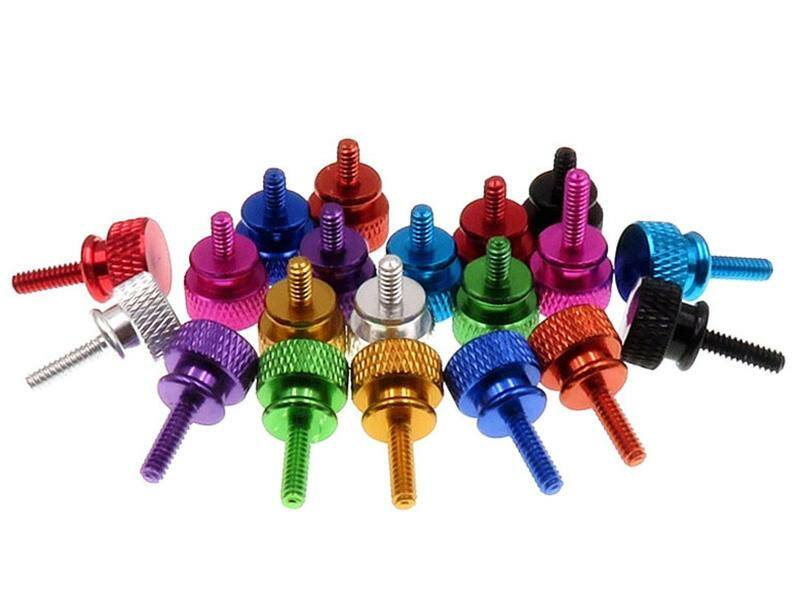
- 6 screws M4x30mm. Ideally, they should have knobs to avoid using a screwdriver when adjusting them. I used screws M4x30 and I 3D printed the knobs, but if you do not have a 3D printer you can et some like these screws with knobs.
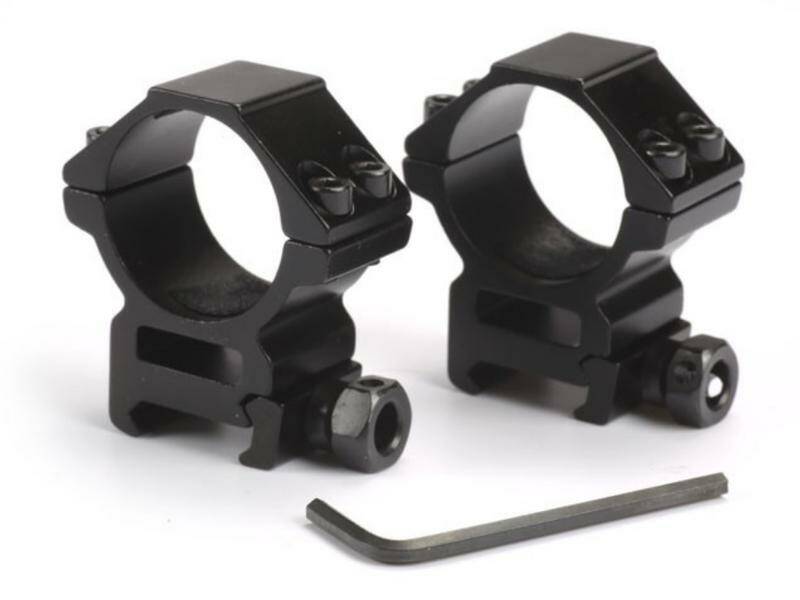
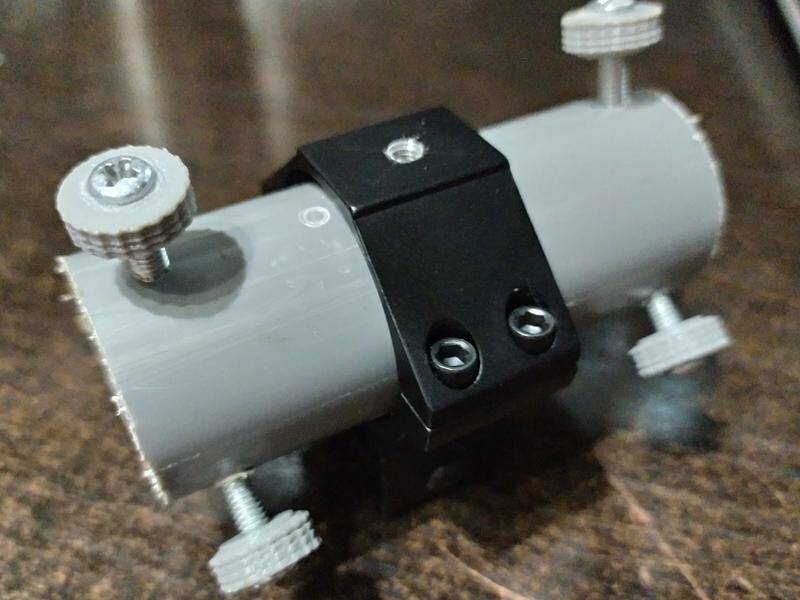
- A picatinny rail. They are often used in Airsoft guns to attach telescopic sights, flashlights and lasers on guns.
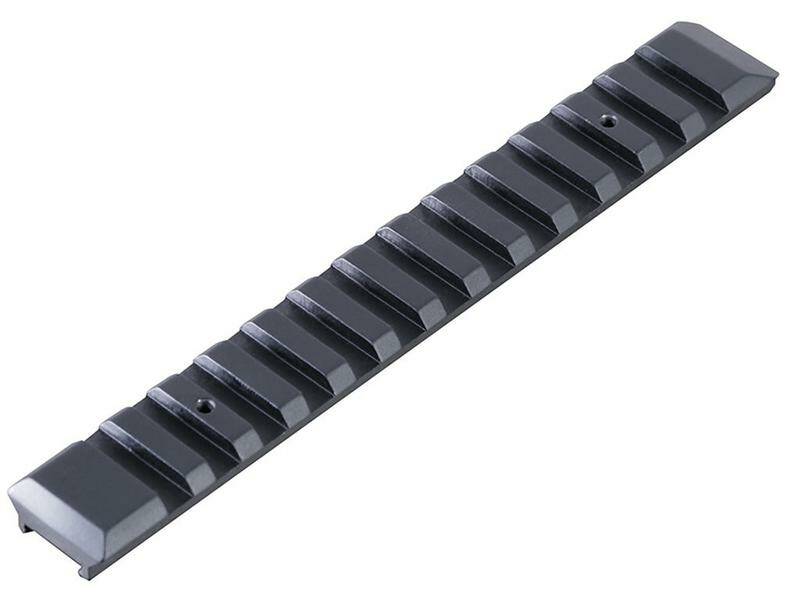
- A picatinny ring with a size as tight as possible to the outside diameter of the PVC pipe.
- Epoxidic glue
Tools
To proceed with the assembly we will also need to have the following tools on hand:
- Saw
- Marker pen
- Burin
- Drill
- 3mm drill bit
- Screwdriver
Building the adjustment rig
To begin, we will need to cut the pipe to the size we need. It should cover the thinner end of the polar finder leaving the eyepiece part outside. I recommend that the front part of the finder does not protrude, but also do not lie inside the pipe more than 5mm.
Once the pipe has been cut, we will place the adjustment screws. To do this, we will make three marks at 1cm from each end of the tube, forming an equilateral triangle between them.
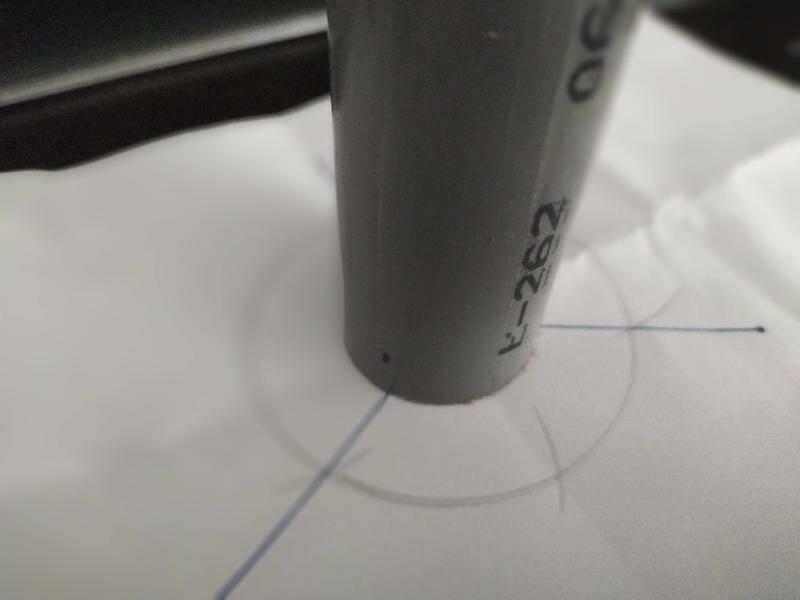
To open the holes for the screws, the first thing we will do is use the burin to create a small indent in each mark. That will allow us to position the drill bit without risk of slipping on the pipe when pressing.
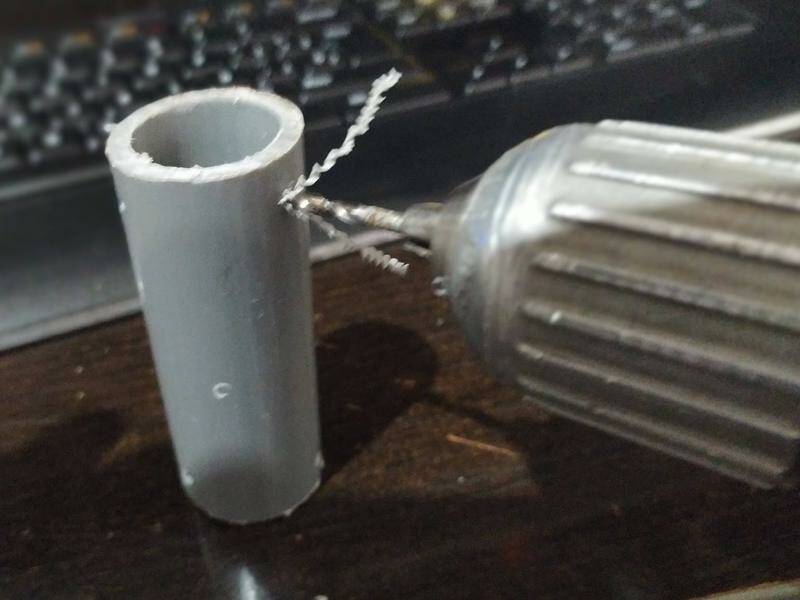
With the drill we will open the six holes in the plastic pipe. We have chosen a 3mm drill bit since when opening the hole it usually ends a little wider and we can insert the 4mm screws with a little pressure and thread the hole with the screw itself.
We will put the screws using the screwdriver so that they are as perpendicular as possible to the surface of the tube. Inserting them until the tip can be seen to come out of the pipe is sufficient.
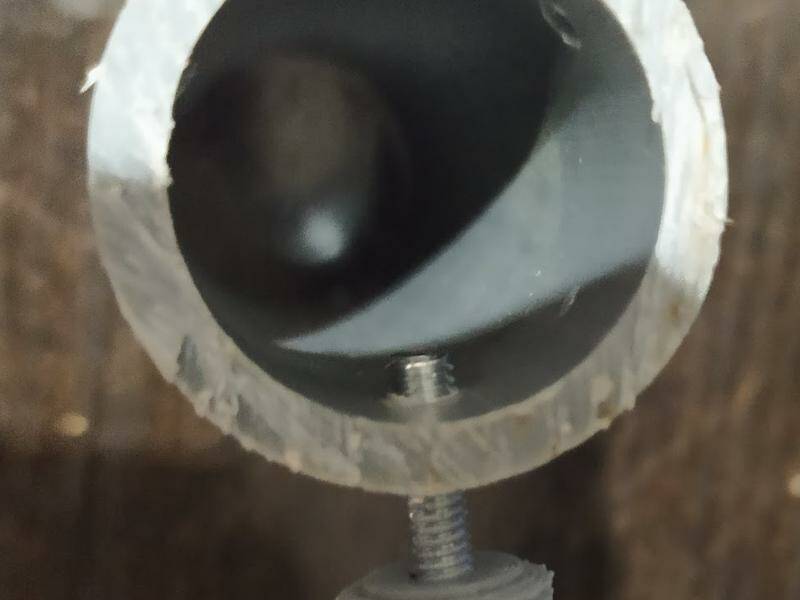
Especially at the beginning, it will be difficult to insert the screws. If the holes are too narrow, we can always reinsert the bit with the drill and move it a little to enlarge the hole.
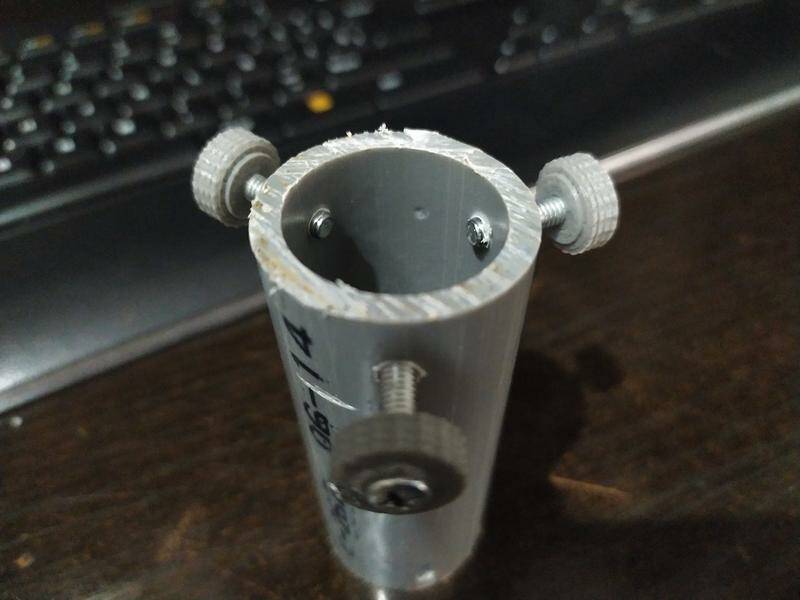
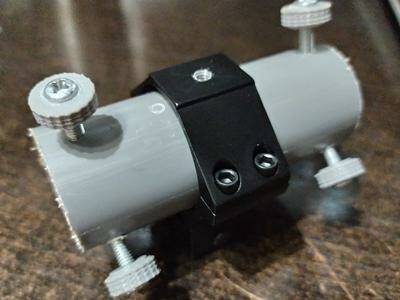
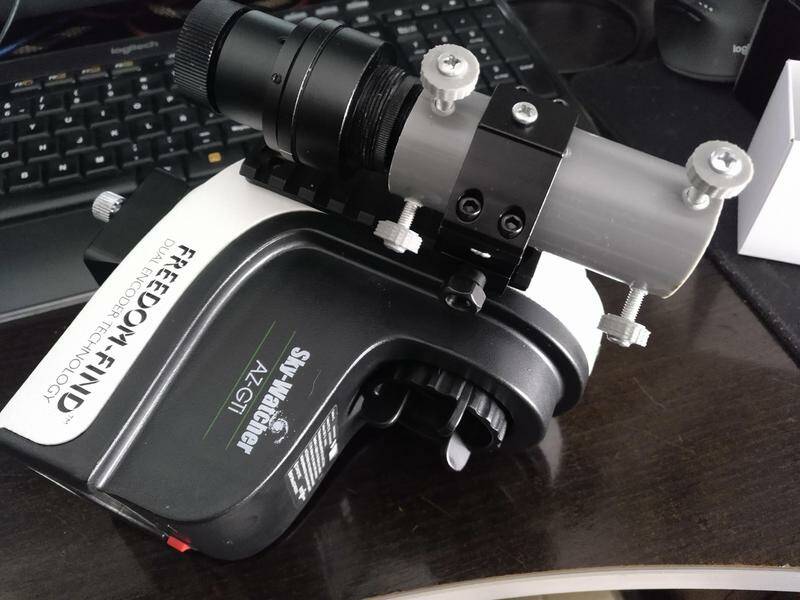
We already have the adjustment tube. The next step is to put it inside the picatinny ring and tighten it so that the tube is firmly fixed parallel to the rail on which the ring will be attached.
Fitting the rail
To attach the rail, we first have to position it well on the AZ-GTi. In my case I chose the right side of the mount (if it is in the equatorial position). Also, to avoid alignment problems, we have to make it as parallel as possible to the axis of rotation of the mount. To do this, and taking the edge of the mount as a reference, we will present the rail until we see in what position we want to leave it at the end.
The best way I found to glue the rail was to use epoxy glue. We prepare the mixture and add glue to the rail. Then we position it in place and wait for it to dry.
Fitting the adjustment tube and polar finder
To finish the assembly, we put the picatinny clamp on the rail and fix it. Then we will place the polar finder inside the tube and tighten all the screws on the side closest to the eyepiece equally to fix it inside. We will also tighten the screws at the far end of the eyepiece, but more gently.
And that's it. We already have our polar finder for the AZ-GTi.
But before it can be used efficiently, it needs to be adjusted for the best possible precision.
Collimation and polar alignment
After mounting the adjustment tube with the finder on the AZ-GTi, we must first collimate the polar finder, and once collimated, we can make the polar alignment process to begin to use it.
Conclusions
Of all the options I tested in its day, this is the one that gave me the best result, since the rest of the options were not as accurate as having the finder well collimated with the Right Ascension axis.